
Introduction to ClickUp and Its API
ClickUp is a powerful project management tool packed with features like customizable workflows, tasks, documents, goals, reminders, and more. It can serve as a central hub for your team's work. However, to fully explore ClickUp's capabilities, you need to integrate it with other tools you use.
This is where ClickUp's powerful API comes into play. In this article, we'll explore the potential of ClickUp's API and how you can use it.

Why Use the ClickUp API?
Here are some of the key reasons to use the ClickUp API:
Overview of ClickUp's API Capabilities
ClickUp's API allows full access to its platform capabilities. With it, you can:
- Manage projects, lists, tasks, and all ClickUp entities
- Automate workflows and business logic
- Build custom reports and analytics
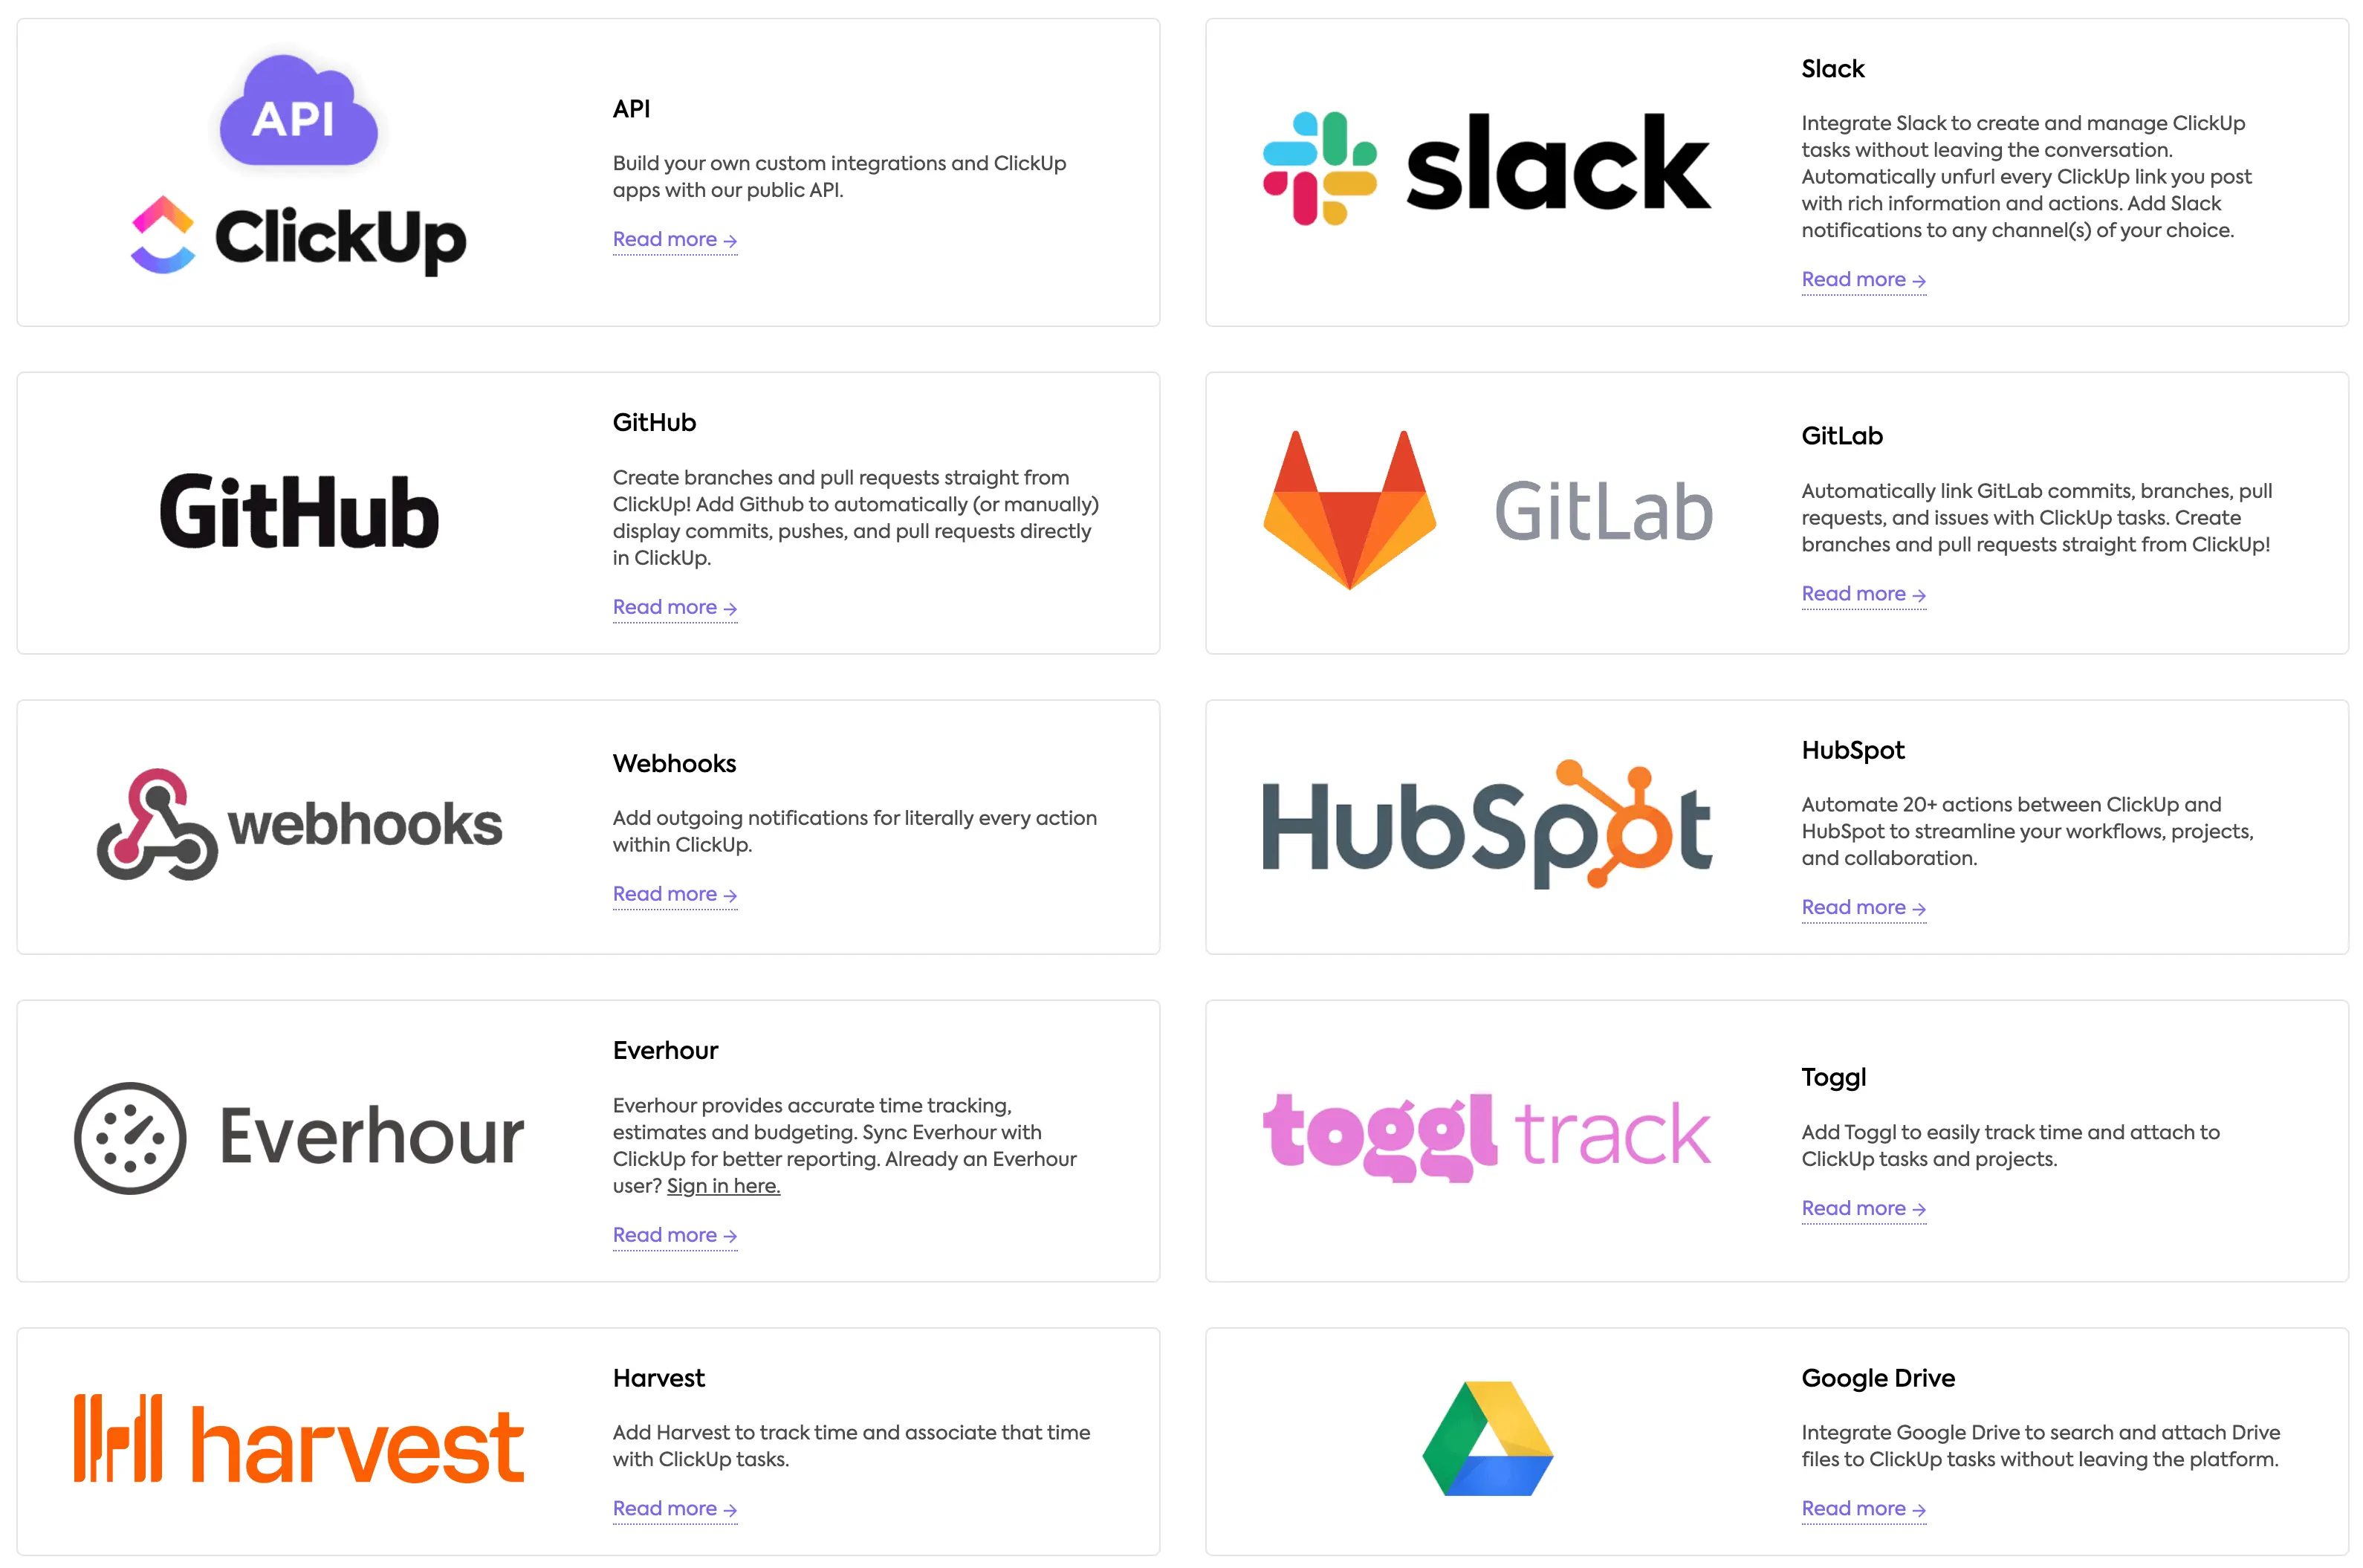
- Integrate with other tools your team uses
- Create custom ClickUp experiences tailored to your workflows
Here are some of the key things the API provides access to:
Automate Processes
You can use ClickUp's API to automate your work. For example, you could create a Zapier integration to automatically add new tasks to ClickUp based on form submissions. Or you could set up webhooks to trigger actions in ClickUp when a task status changes.
Sync Data
Sync data between ClickUp and other tools you use. Create ClickUp tasks from Slack or auto-populate custom fields from your CRM. Keep the data between systems up-to-date automatically.
Improve Functionality
Add new features to ClickUp that don't exist yet. Build browser extensions, custom reports, new visualization apps and more on top of the core Click Up API capabilities.
Centralize Information
Pull data from multiple sources into ClickUp using the API. Centralize project information in ClickUp by importing task data from Jira, Trello, Asana, and other tools. Create a single source of truth.
Custom Integrations
Build new integrations with ClickUp at the center. For example, connect ClickUp tasks to a live chat app so support agents can create tasks while chatting. Or display ClickUp task statuses on office digital signs.
The API opens up many possibilities for customizing and extending ClickUp's capabilities.
Getting Started with the ClickUp API
What is ClickUp API?
The term "API" can seem intimidating if you don't have a coding background. But don't worry, APIs are quite simple in their purpose. An API allows different software applications to communicate and share information. This enables integrations like getting ClickUp notifications in Slack or seeing task due dates in your calendar app.
The ClickUp API lets ClickUp connect to other tools you use. It allows developers (or non-coders using no-code tools) to access ClickUp data and build custom integrations, automations and added functionality.
Working with ClickUp API
Here are a few steps to get started:
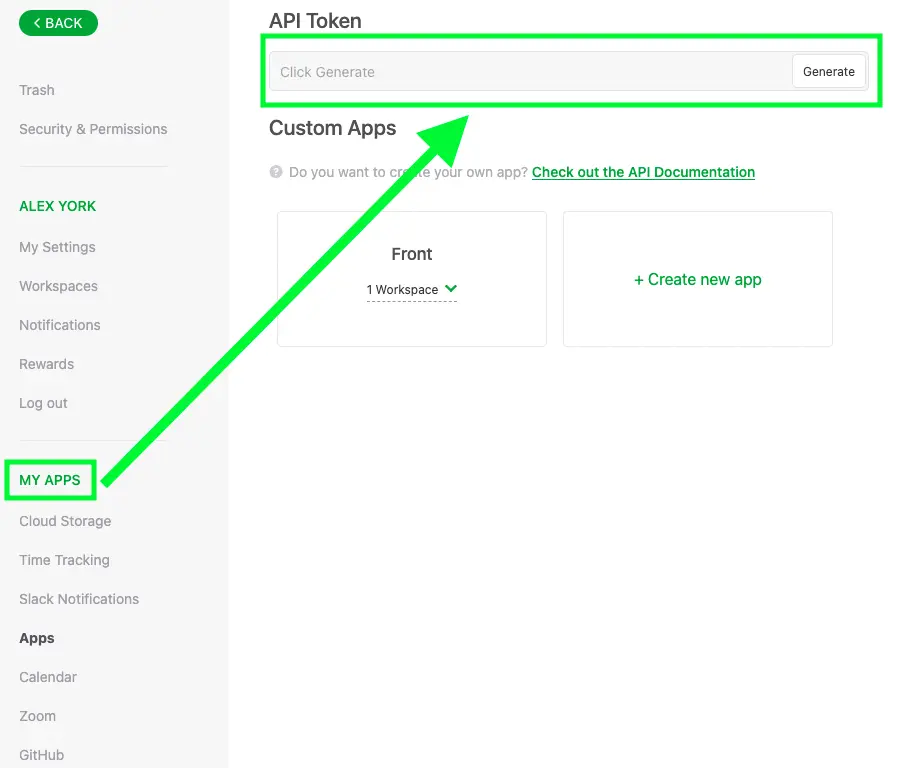
Step 1 – Get API Credentials
First, you'll need to grab API credentials:
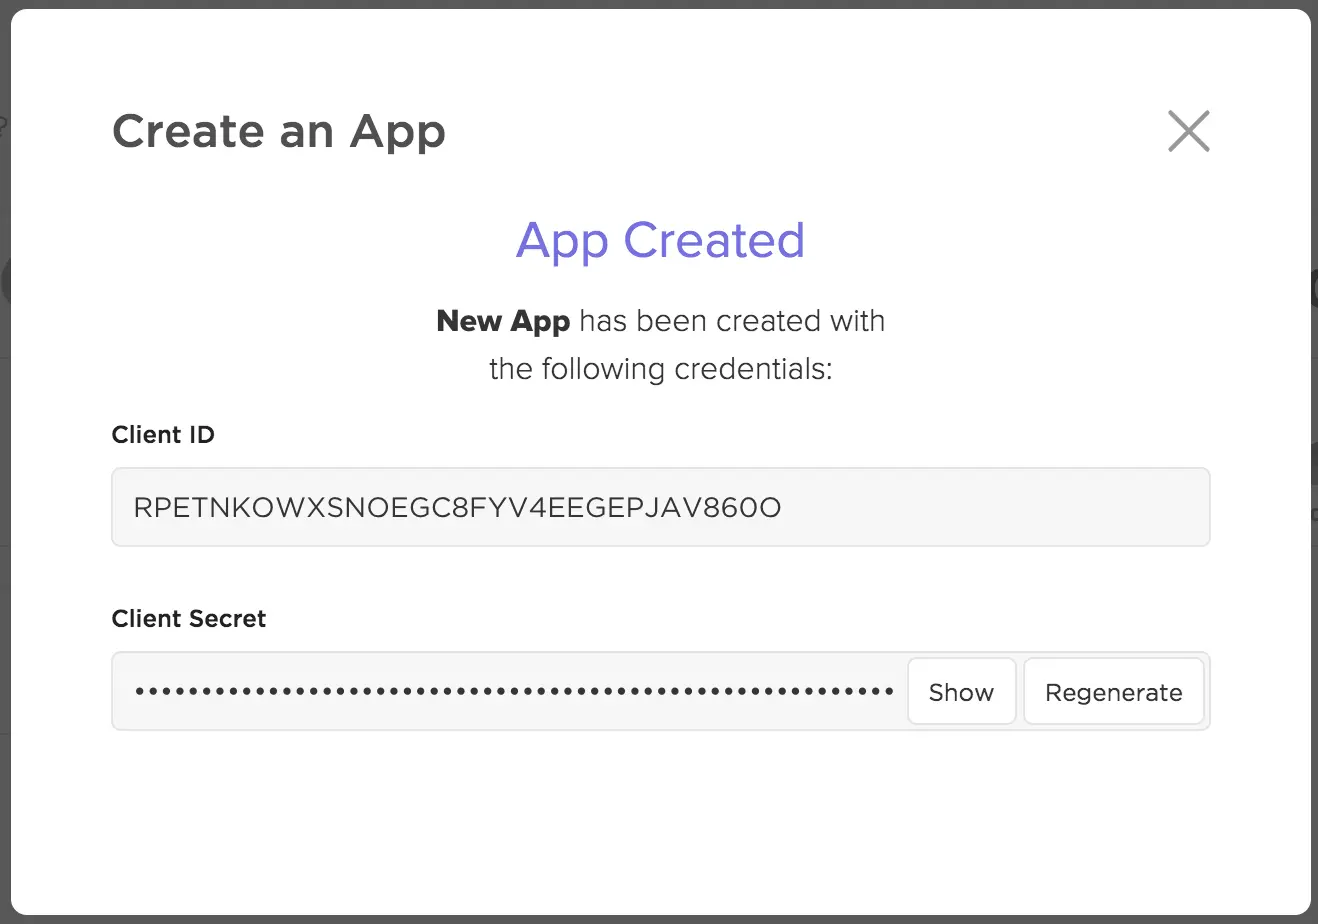
- Go to the Apps section in your ClickUp profile
- Click "Create New App"
- Give the app a name and click Create
- Grab the Client ID and Client Secret
For personal apps, you can also use your API token found in your ClickUp profile.
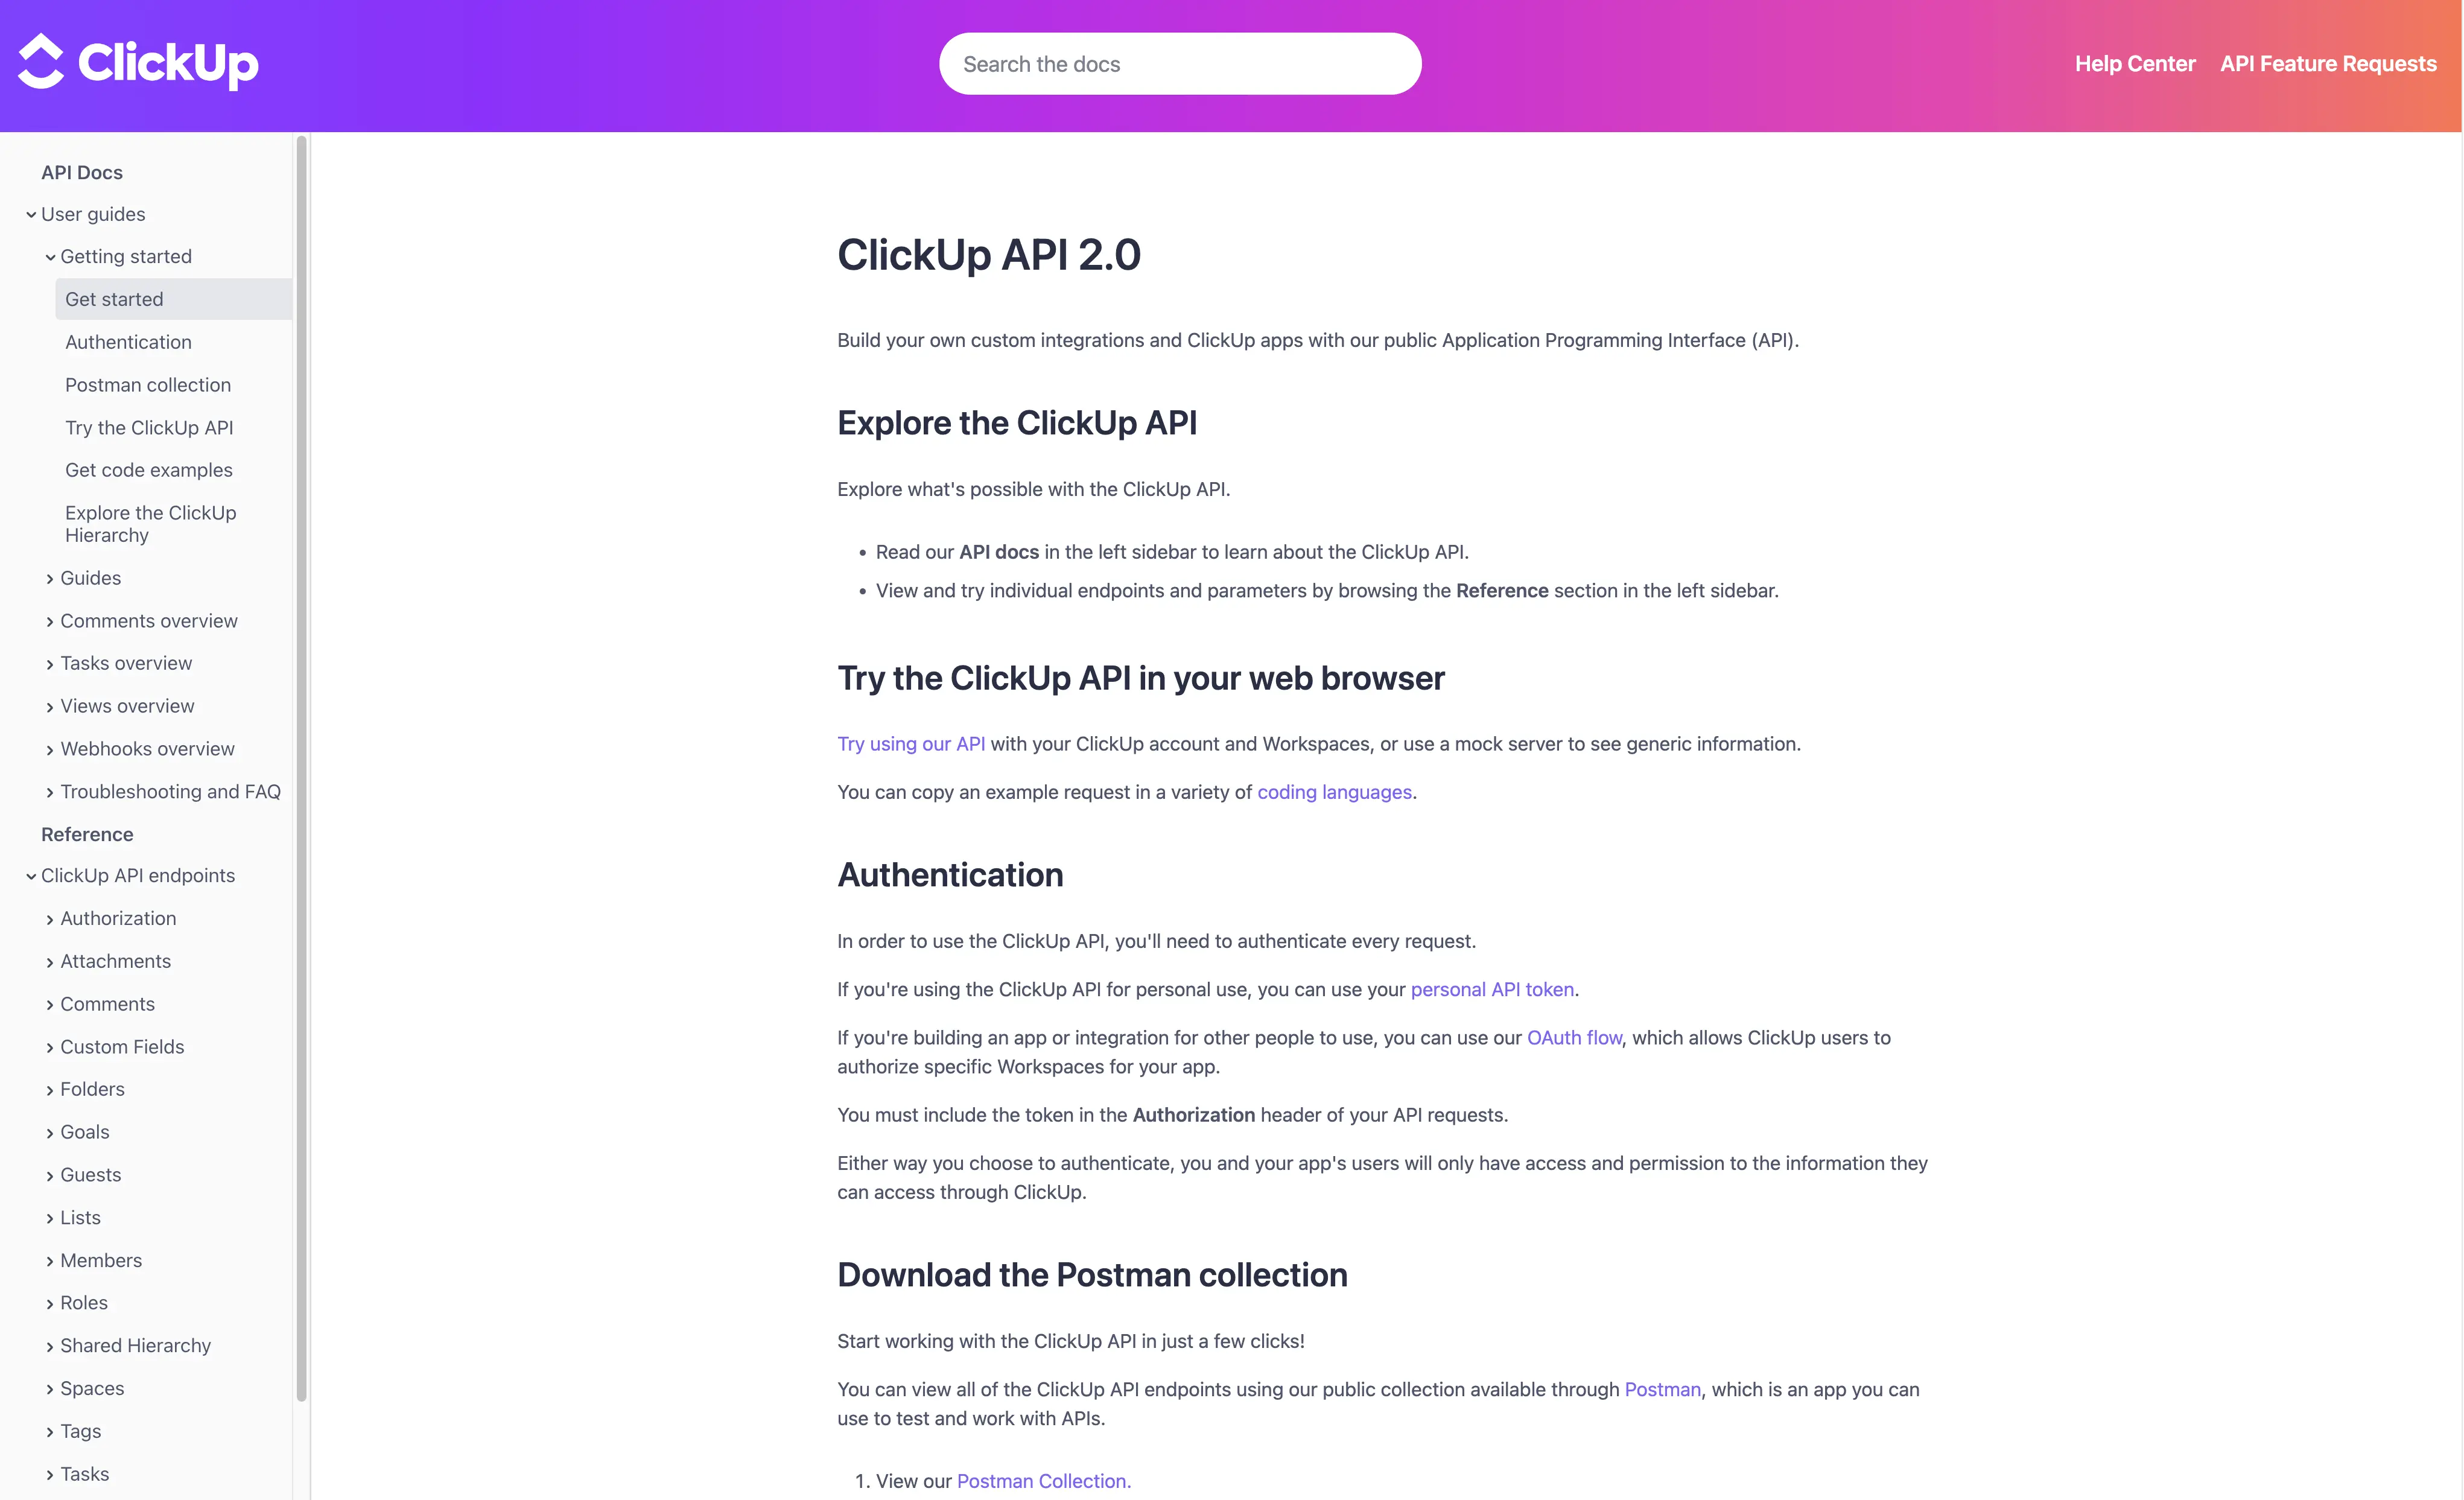
Step 2 – Check Out the Clickup API Documentation
Next, review the ClickUp API Developer Documentation to get an overview of all available endpoints and capabilities. Having this handy will help you explore what's possible.
Step 3 – Make Sample API Calls
Using an API client like Postman or Insomnia, try out some sample API calls. Follow the docs to fetch a task, create a comment, or update a custom field. This will familiarize you with the request formats and response structures.
Here are some test calls:
- Create a task - POST /task
- Update task name - PUT /task/{id}
- Get user details - GET /user

Understanding the ClickUp API Structure
How the ClickUp Rest API Works
The ClickUp API is a REST API that uses predictable URLs and common HTTP response codes. It returns data in JSON format.
Here is a quick overview of how it works:
Authentication
There are two ways to authenticate with the ClickUp API 2.0:
- Personal Token: You can generate a personal token on your ClickUp profile. This token should be included in the Authorization header of your API requests.
- OAuth2 Flow: For more advanced use cases, such as creating an application that others will use, it is highly recommended to create an OAuth app and authenticate using the OAuth2 flow. This flow will provide you with an access token, which should be included in the Authorization header of your API requests.
Important: If you're creating an app for multiple users, use OAuth2 authentication.
To call ClickUp API endpoints, you need an access token. Include this token in the Authorization header of your API requests.
Resources
The API exposes "resources" that you can create, read, update, and delete (CRUD). For example, some resources include:
- Tasks
- Lists
- Folders
- Teams
- Goals
- Comments
You perform CRUD operations on these resources using HTTP methods like GET, POST, PUT, and DELETE.
Endpoints
The API endpoints follow predictable patterns like:
GET /task/{task_id} - Get a taskPUT /task/{task_id} - Update a taskPOST /list/{list_id}/task - Create a task in a list
It's easy to guess what an endpoint does just by the structure of the URL.
Webhooks
You can also use ClickUp webhooks to receive real-time notifications when certain events happen (e.g. a task status changes). This lets you build reactive integrations.
ClickUp API Tokens
The ClickUp API offers three authentication mechanisms:
ClickUp API tokens provide personalized access to ClickUp resources owned by that user.
Each user can generate a token from their ClickUp profile settings.
API requests are then authenticated by passing this token in the header.
Authorization: pk_123456789_ABCD1234ABCD1234ABCD1234
How To Use the ClickUp OAuth2 Flow
For multi-user apps, ClickUp recommends OAuth 2.0 authentication. This flow involves:
- Create OAuth App - Go to team settings > Integrations > "ClickUp API" > Create new app with name and redirect URL. Receive client_id and secret.
- Authorization Code - Redirect user to https://app.clickup.com/api?client_id={client_id}&redirect_uri={redirect_uri}. User accepts/rejects. Redirected to redirect_uri with code.
- Access Token - Use POST /api/v2/oauth/token with client_id, client_secret, and code to get access token. Use in Authorization header.
- Token Teams - User selects authorized teams (Workspaces) during authorization. Check authorized teams with GET /api/v2/team. Redirect user again to authorize additional teams.
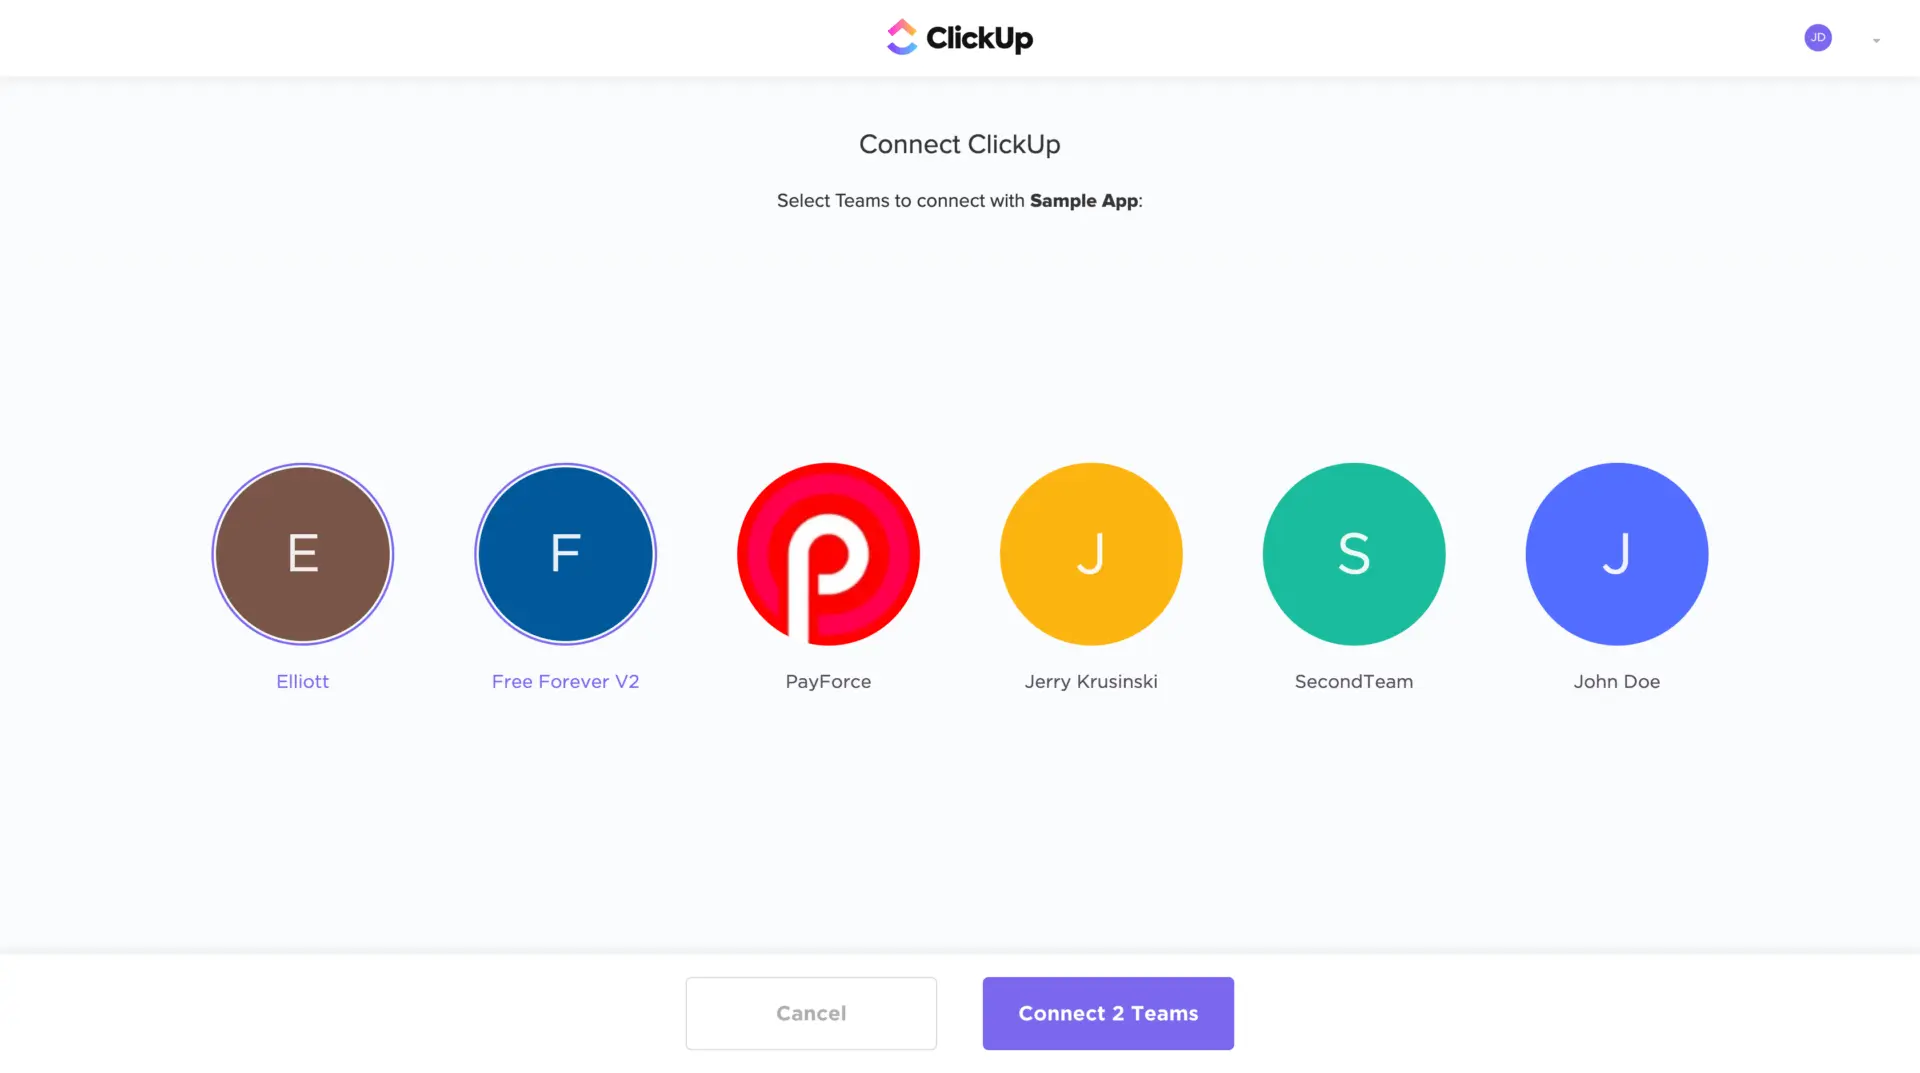
Selecting Workspaces
During the OAuth authorization process, users can choose which respective Workspaces they want to grant access to your app. They'll see a screen that allows them to select one or more Workspaces.
You can check which Workspaces a user has authorized for your app by using the Get Authorized Teams endpoint.
If a user needs to grant access to additional Workspaces later on, you can simply redirect them back to the authorization URL. This will let them modify the Workspace selections for your app.
Personal ClickUp API Key
When using a personal ClickUp API key, be cautious against using it in production applications used by others. If your key gets compromised, you may lose access. For multi-user apps, OAuth 2.0 is recommended.
Core API Capabilities
Now that you understand the basics, let's explore some of the core things you can do with the ClickUp API:
Manage Tasks
The core of ClickUp is tasks organized into lists. The API provides full CRUD (Create, Read, Update, Delete) access to tasks and lists. This includes:
- Creating tasks
- Updating task details like name, description, status, priority, etc.
- Adding tasks to lists
- Changing task order and indentation
- Marking tasks as completed
- Deleting tasks
- And more!
Manage Lists
Lists in ClickUp represent task lists and Kanban boards. The API provides capabilities like:
- Create, update, and delete lists
- Get all the tasks in a list
- Add tasks to a list or remove them
So you can integrate list structures and task organization from other tools into ClickUp.
Users and Teams
The API allows you to manage ClickUp users and permissions programmatically:
- Invite, update, or remove users
- Create and modify custom roles
- Update user permissions and access
For example, you could provision or de-provision users automatically based on data from your HR system.
Comments
The Comments API lets you add, update, and fetch comments on tasks, lists, and team chat posts in ClickUp. This allows you to sync comments bi-directionally with tools like Slack, GitHub, Jira, and more.
Custom Fields
ClickUp allows the creation of custom fields to capture additional information for your tasks. The API provides access to custom fields, so you can:
- Get custom field values
- Update custom field values
- Create and delete custom fields (for developers building on ClickUp)
Relationships & Dependencies
The API provides access to the relationships between tasks like:
- Subtasks - Manage parent-child task relationships
- Dependencies - Link-dependent tasks that have precedence
Time Tracking
ClickUp offers sophisticated time tracking. The API enables:
- Recording time against tasks
- Getting time reports
- Changing tracked time
- Managing timers
So you can build custom time tracking and reporting.
Attachments
Attaching files to tasks is exposed through the API as well. You can programmatically attach files from cloud storage like Google Drive or Box.
Search and Filtering
The search and filtering capabilities let you find tasks that match specific criteria. You can then sync these filtered task sets into other apps.
Much More
This just scratches the surface. Other notable API capabilities include:
- Webhooks for event-driven integrations
- Folders, spaces, and hierarchy management
- Goals, key results and Objectives and Key Results (OKRs)
- Checklists and checklist items
- Due dates, reminders, and scheduling
- Email notifications
- Tags and tag management
- Dependencies between tasks
- Contact and account data
- Teams, groups, and permissions
- And much more
As you can see, the ClickUp API provides extensive capabilities to manipulate and extract data from ClickUp.
Strategies for Successful ClickUp API Integration
Plan an Integration
With the basics down, start brainstorming what kind of integration you want to build. Refer to the example ideas in this post for inspiration. Scope out something exciting and useful!
Start Small
Rome wasn't built in a day. Start by getting a very simple end-to-end integration working, even if it's just creating a task from a GET request. Get a "proof of concept" working, then iterate to add more capabilities.
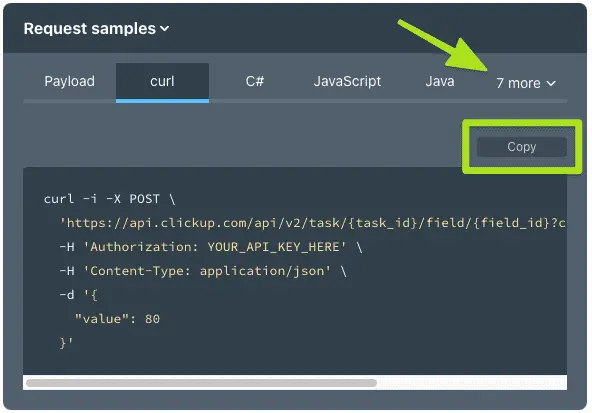
Use curl or a tool like Postman to try some API requests. For example:
curl -H "Authorization: pk_123456789" https://api.clickup.com/api/v2/user
See what information you get back for different endpoints like user, team, folder, task, etc.
Use Webhooks
For dynamic integrations, make sure to use ClickUp's webhooks for real-time event monitoring. This saves you from having to poll the API constantly.
Building Applications with ClickUp API
Create a ClickUp App
When creating a ClickUp App, it is recommended to use OAuth 2.0 authentication. Here is an overview of how OAuth 2.0 works with ClickUp:
- It uses the authorization code grant flow.
- First, you register your app in ClickUp and get a client ID and secret.
- When a user wants to sign in, you redirect them to ClickUp's OAuth URL along with your client ID.
- The user sees a consent screen and approves access to their ClickUp account.
- ClickUp redirects back with an authorization code in the callback URL.
- You exchange this authorization code for an access token via the API.
- You use the access token to make API calls on behalf of the user.
The benefit of OAuth 2.0 is that each user gets their token, so you don't access others' data. And the user can revoke access anytime.
Once comfortable, you can start building your scripts and apps to use the API:
- Automate repetitive processes
- Develop integrations
- Build reports
- Sync data
- And more!
The possibilities are endless once you start tapping into ClickUp's capabilities.
ClickUp Developer Documentation and Resources
Read Sample Apps
Check out ClickUp's sample applications in their App Gallery for example implementations you can learn from. They even have open-source code samples on GitHub in languages like Node, Python, and C# that you can inspect. Great for jumpstarting.
Try the API in Your Web Browser
The ClickUp API Reference lets you test and experiment with the unified API right in your web browser - all in one place. Each endpoint page has a "Try It" option making it easy to edit and merge requests without switching between multiple tools or platforms.
You can use your API Key to view your actual ClickUp data and Workspaces or explore generic information with the mock server - simplifying communication and saving time.
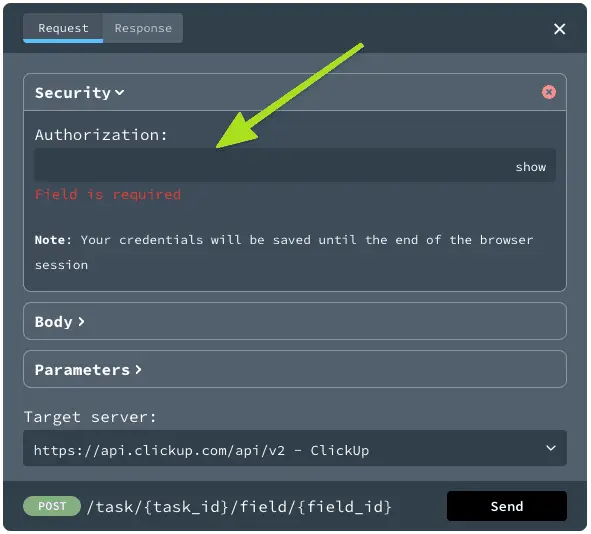
Step 1: Enter Your API Key
- Go to any endpoint page.
- Click "Try It" in the top-right corner.
- Expand the "Security" section.
- Enter (or paste) your API key.
Tip: If you're using the Mock server, any value is accepted as an authorization key.
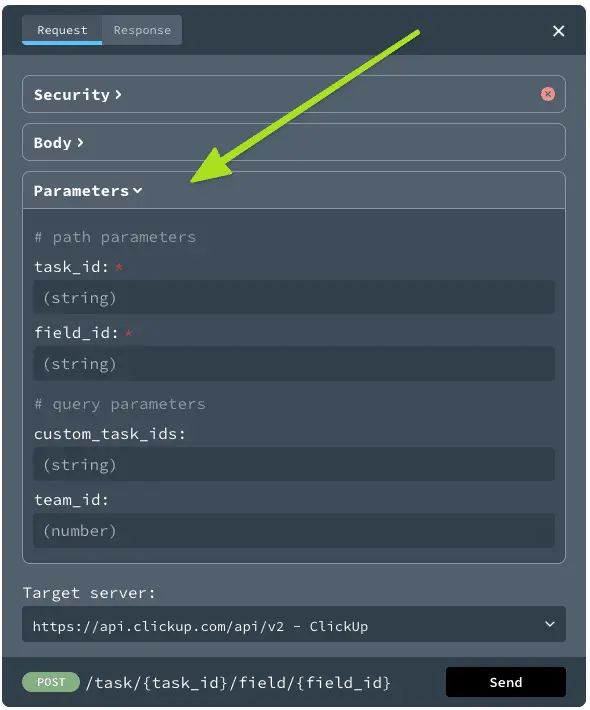
Step 2: Enter Request Body and Parameters
- Expand the "Body" section to add information to your request.
- Expand the "Parameters" sections to add parameter details to your request.
Tip: If you're using the Mock server, any value is accepted in the required and optional fields.
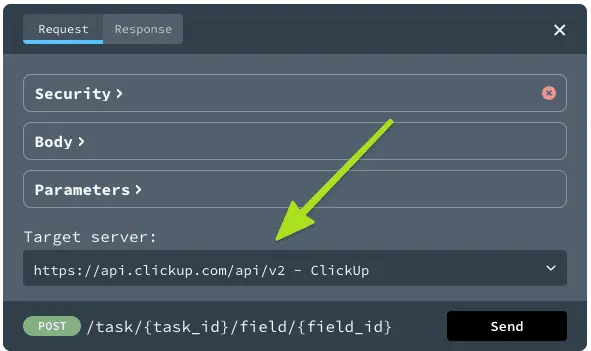
Step 3: Select a Target Server
Select from the following target servers:
- https://api.clickup.com/v2 - ClickUp
- https://{mock-server-id}.remockly.com - Mock Server
This feature allows you to easily test and experiment with the ClickUp API without needing to set up a development environment or write code, saving you time while enabling collaborative editing and merging.
Rate Limits
To allow efficient performance for all users, ClickUp applies request rate limits per token. These rate limits apply to both personal and OAuth tokens, and they vary depending on your ClickUp Workspace Pricing Plan.
Rate Limits by Workspace Plan:
- Free Forever, Unlimited, and Business Plan: 100 requests per minute per token.
- Business Plus Plan: 1,000 requests per minute per token.
- Enterprise Plan: 10,000 requests per minute per token.
ClickUp API Examples Uses and Integrations
Now that you have a sense of what's possible, let's look at some specific ClickUp API examples of how you could use the API:
Sync Assigned Tasks to Google Calendar
Build a simple script that fetches all tasks assigned to a user and creates corresponding calendar events in Google Calendar to represent them. Automatically update events as task details change in ClickUp. This keeps calendars in sync.
Create GitHub Issues from ClickUp Tasks
When a task is marked "In Progress" in ClickUp, use the API to automatically create a new issue in GitHub for developers to work on. Close the issue when the task status changes to "Complete".
Generate Invoices from Logged Time
Fetch time logged on tasks through the API and automatically compile invoices based on billable hours tracked. Email invoices to clients or sync to accounting software.
ClickUp Chatbot
Build a chatbot interface using tools like Dialogflow that allows creating tasks through natural language conversations. Understand requests like "schedule a meeting for Friday at 2 pm".
Automatic Lead Assignment
Create rules that watch for new tasks in certain lists and automatically assign them to sales reps based on the mappings you define. Help route leads faster.
Password Reset Workflow
When a user forgets their ClickUp password, collect their email through a form on your site. Use the API to send them a password reset link from ClickUp's native system.
Custom Reporting
Pull data from ClickUp into a business intelligence tool to build custom reports. Create views like burndown charts, resource allocation over time, and more.
Third-Party App Reviews
Show the latest app reviews from the ClickUp Marketplace on your website using the API. Keep users up-to-date on the best new app releases.
Submit Timesheets to Payroll Apps
Developers could build an integration that submits logged hours from ClickUp to payroll apps like Gusto automatically each pay period. Smooth out the payroll process.
The possibilities are endless when you have access to a robust platform like ClickUp through API access.
Conclusion
The ClickUp API opens up tremendous opportunities for automating workflows, building custom tools, and centralizing your team's information. Whether you want to simplify repetitive tasks or create the next hot productivity app, the API provides the capabilities you need.
So put on your developer cape, dive into the API docs, and get ready to crush your productivity goals faster than a speeding bullet!
Got a project with ClickUp?
Book a call Now 🗓️Supercharge your business today