

Introduction To ClickUp GitLab Integration
Integrating your project management app with your software development tools is a game-changer for boosting productivity with simplified and automated workflows.
As a comprehensive project management app, ClickUp can integrate with many software programs available in the market. GitLab is one of them. It's recognized as a top level tool among Agile and DevOps teams for managing their projects' lifecycle.
In this article, we'll guide you through the integration between ClickUp and GitLab, unlocking the full potential of these powerful platforms.
Key Takeaways
- Associating code activity with ClickUp tasks automatically or manually
- Updating task statuses based on GitLab actions like commits
- Creating branches and managing merge requests directly in ClickUp
- Quickly switching between tasks and related branches/commits/Merge Requests without leaving the platform
How Does Integrating GitLab with ClickUp Enhance Project Management for Development Teams?
Integrating GitLab with ClickUp streamlines project management for development teams by linking code activities directly to tasks. This integration allows for automatic updates of task statuses based on code commits, branch creations, and merge requests, enhancing visibility and collaboration across the team. Developers can manage code and track progress without switching between tools, fostering a more efficient workflow and better alignment between project management and software development activities.
Why integrate GitLab with ClickUp?
Benefits of integrating project management with software development tools
Before diving into code, developers get improved traceability between tasks and plans with GitLab ClickUp integration. That way, teams can easily track progress from tasks to development software. This integration streamlines managing each project issue effectively.
This includes:
- Issue tracking - Keep track of your bugs within your project management tool
- Source control/Version control - Coordinate development activities and project planning while collaborating with teams to enable efficient workflow management. Keep historical context of your projects for eventual changes.
- Efficient collaboration - With project management tools like ClickUp, you can keep your discussions and updates in one place.
- Automated workflows - Save a lot of time by connecting these two powerful platforms. It allows you to automate your repetitive tasks and workflows, reducing manual work.
This helps everyone stay aligned with less context switching. That way, you will deliver better products in no time!
GitLab integration in ClickUp
The GitLab integration in ClickUp helps teams build software more efficiently by improving relationships between tasks and code. This allows you to connect your GitLab repositories with your ClickUp Spaces to make development work faster and more transparent:
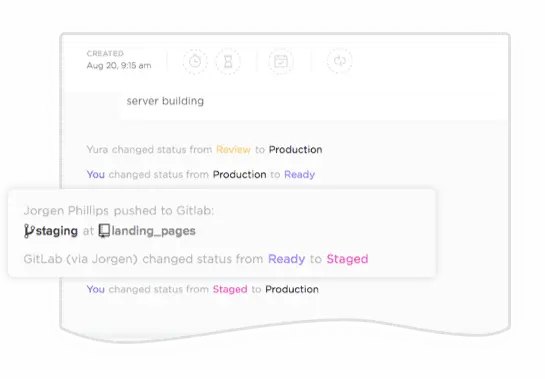
- GitLab activity in ClickUp tasks - Associated commits, branches, and merge requests are displayed directly in your ClickUp tasks. You can associate them automatically or manually.
- GitLab notifications in ClickUp - Get notifications when new GitLab items are added to ClickUp tasks.
- Task statuses update - Based on GitLab actions, your task statuses automatically change. To do so, you need to include the task ID in commit messages or merge request titles.
- Create new GitLab actions from ClickUp - The integration adds handy shortcuts for developers to quickly create new GitLab actions.
- Switch between code and tasks - It's easy to track workflows between ClickUp and GitLab in one click.
Connect ClickUp to Your GitLab Account
Connect GitLab with ClickUp
The first step is authorizing the GitLab ClickUp integration within your ClickUp account. This allows ClickUp to access your GitLab repositories.
Here's how to set it up:
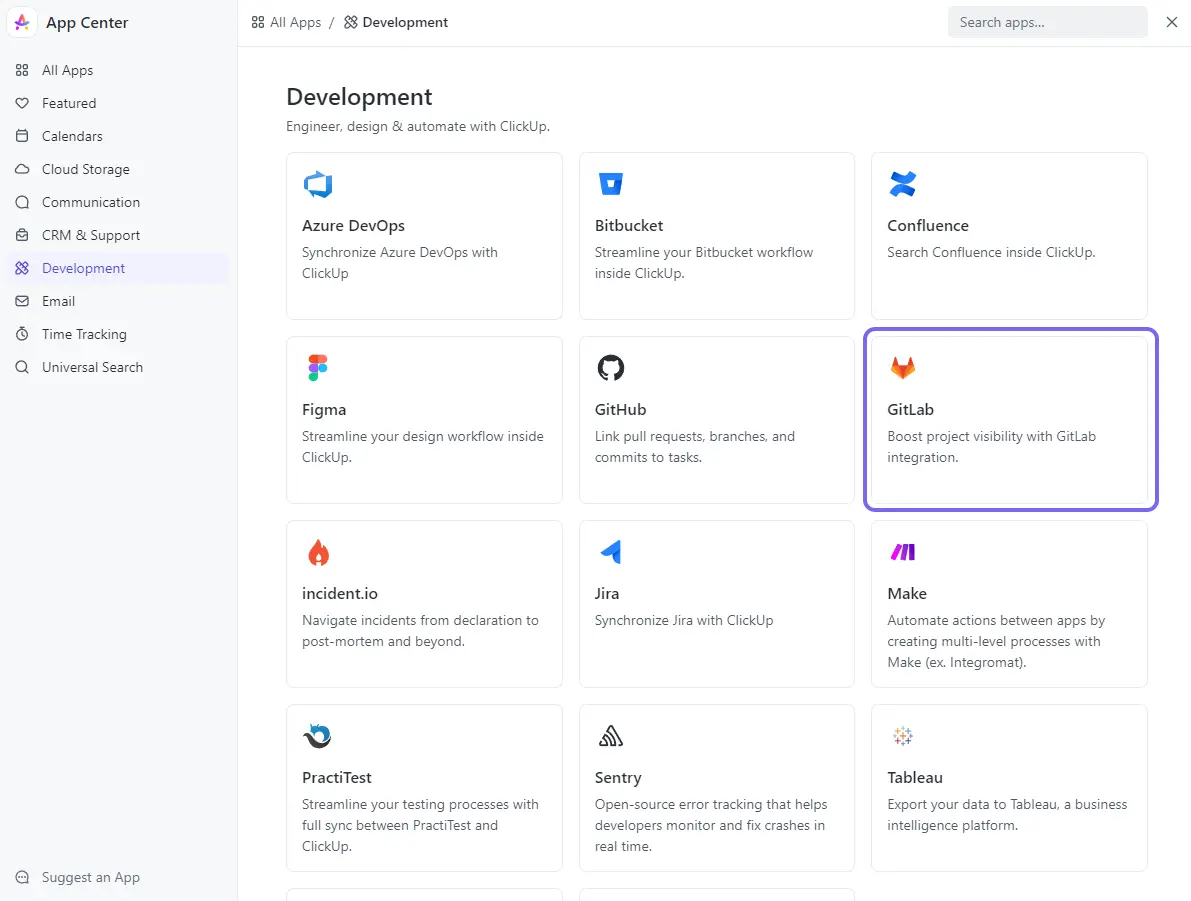
- On the top left of your ClickUp interface, click the name of your current workspace, go to Apps, then App center
- Under Development, select the GitLab app.
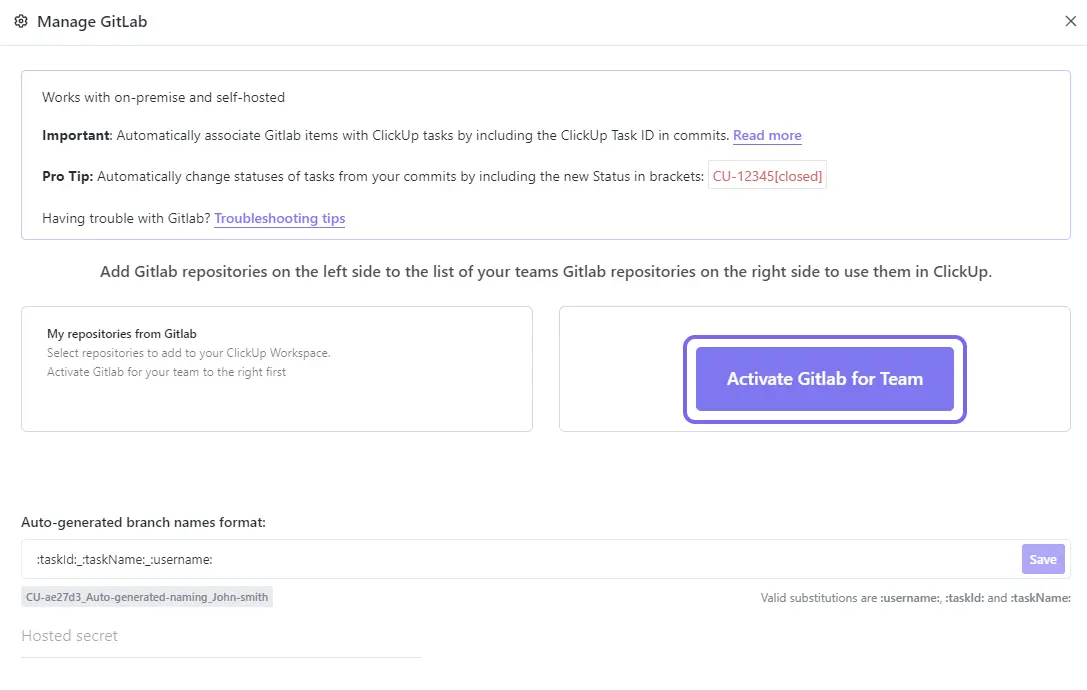
- Go to Manage and a little window will be opened. If you're connecting GitLab for the first time in your workspace, you have to Activate GitLab for team.
- Click + Add GitLab. You'll have to choose whether to use GitLab.com or a hosted version
- Sign in to your GitLab account.
- Authorize ClickUp to connect with your GitLab repositories.
Using GitLab.com vs. Self-Hosted
To put things simply, using GitLab.com is like renting an apartment - It takes care of everything (servers, maintenance, etc.). Using a hosted version of GitLab is like owning a house - you have more control but need to handle maintenance yourself, for example.
The setup of GitLab.com is pretty straightforward. Just sign in and authorize the integration.
For self-hosted GitLab instances, you'll need to provide:
- Your GitLab URL, like
https://gitlab.company.com - A personal access token from your GitLab account.
This allows ClickUp to access your self-hosted instance via the API.
Set Up the ClickUp GitLab Integration
Once the connection is established, you have to set up the ClickUp GitLab integration settings based on your team's needs. This includes mapping your projects and repositories and limiting shared repo.
Add Repositories to ClickUp
You can select which GitLab repositories to bring into your ClickUp account.
Adding a repo to ClickUp does not expose your code. It simply allows associating commits, branches, etc. with tasks.
To add a repository:
- In the GitLab integration, go to the Repositories section.
- Next to the repo you want to add, click + Add to ClickUp.
- Select which ClickUp Spaces can access the repository.
Now, your team can link repository actions like commits and merge requests to tasks within those Spaces.
Limit Shared Repositories
When first connecting GitLab, all of your personal repositories are listed. Be selective in which repositories you share.
For example, you may not want your private experimental projects added to the company Workspace. Limit shared repositories to avoid clutter, prevent distraction and for security purposes.
Sync GitLab actions with ClickUp tasks

The GitLab ClickUp integration provides rich features to boost your productivity and efficiency. You'll be able to automate task creation and updates, track commits, merges and deployments, and improve team collaboration and communication. Gain deeper insights and analytics to make informed decisions and drive your projects further.
The main benefit of integrating GitLab and ClickUp is associating code activity with tasks.
There are a few ways to do this:
Automatically Sync New Actions
Whenever someone creates a new commit, branch, merge request, etc., ClickUp can automatically link it with any mentioned tasks. It's like setting up automations between both platforms.
To enable this, include the task ID in the GitLab action using common formats like:
#{task_id}CU-{task_id}{custom_task_id}
For example, a commit message with #123 would associate that commit with task ID 123.
Manually Associate Actions
You can also manually associate GitLab activity with tasks in ClickUp. To do so, you can follow these steps:
- Open the task and click the GitLab icon.
- Select the Commits or Branches tab.
- Use the dropdowns to pick a repository, branch, etc.
- Click the appropriate one to associate with the task.
This lets you selectively choose custom actions to link without adding noise.
Streamline workflows: Update Task Statuses from GitLab commits
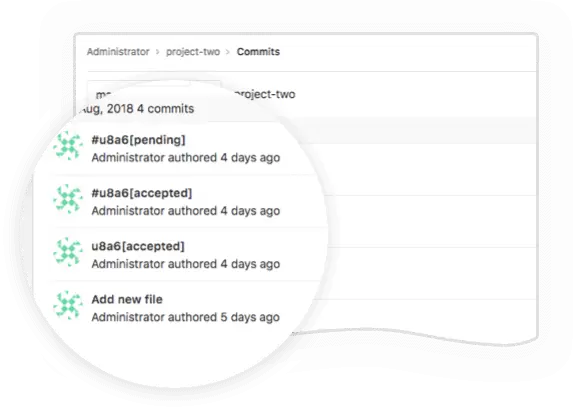
When including the task ID in a GitLab action, you can also specify its status.
For example, a commit message with #123[closed] would automatically close task 123 in ClickUp.
This lets you trigger task status changes right from GitLab. It's really handy!
Manage GitLab Actions in ClickUp
The integration works both ways. You can also take action on branches and merge requests directly within ClickUp.
Here are some ways to manage GitLab from tasks:
Create Branches
To create a new branch from a task:
- Open the task and click the GitLab icon.
- Click the Copy link next to the branch name you want.
- This adds the branch name to your clipboard.
- Paste it into GitLab to create the new branch.
You can also customize the auto-generated branch name format in the integration settings.
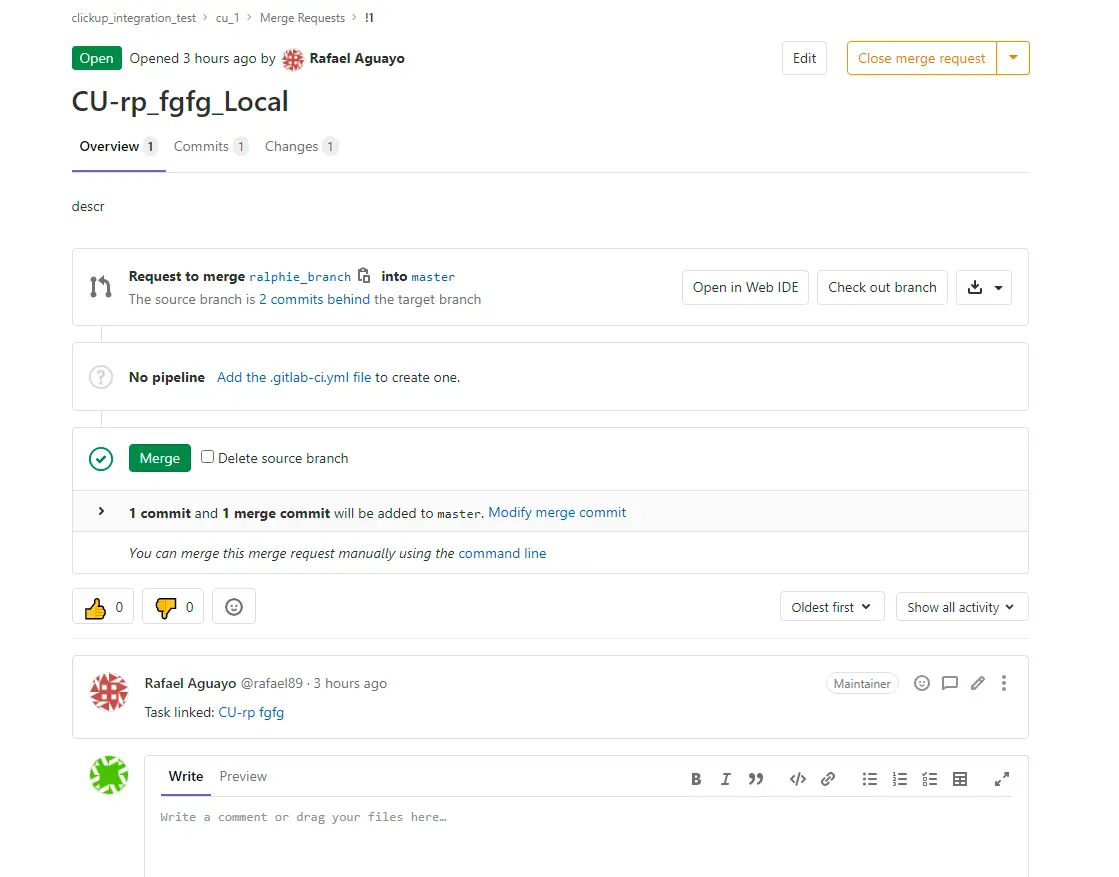
Open Merge Requests
When you create a merge request from ClickUp, it adds the task ID to the merge request in GitLab automatically.
Then you can quickly switch between the merge request and task. It's displayed right in the ClickUp task activity feed. This makes it easy to track a feature from task to code and back again.

To create a merge request from a task:
- Click the GitLab icon in the task.
- Click New Merge Request.
- Fill out the title, select the repository, the source and target branches, and add a description.
- Confirm
Once created, you'll see the merge request details right in the ClickUp task.
Troubleshooting the ClickUp GitLab Integration
If you encounter any issues with the GitLab integration, such as not seeing repositories that should be available or concerns about the difference between personal and professional workspace repositories, there are a few troubleshooting steps you can take:
- Disconnect and Reconnect - If you accidentally connected the wrong GitLab account or there's an issue with the connection, you can disconnect and reconnect your repos or your entire account.
- Reach Out to Support - If you encounter GitLab issues or need further assistance, you can request technical support from the GitLab customer support team. You can also request support from ClickUp's team.
Conclusion
Integrating ClickUp with GitLab is a powerful way to streamline your software development workflows with ClickUp GitLab integration, leveraging triggers and actions to resolve every project issue, and improve collaboration between project management and DevOps teams. By connecting your GitLab repositories, commits, branches, and merge requests directly to ClickUp tasks, you can gain better visibility to track your development processes.
It allows you to automatically associate code activities with related ClickUp tasks to keep the context updated. Task statuses can be updated based on GitLab actions like commits and merge requests. Plus, connecting both platforms allows you to create and manage GitLab branches and merge requests directly within ClickUp. You won't have to switch between platforms to navigate through tasks and related code changes.
Overall, it helps development teams work more efficiently, reduce context switching, and deliver higher quality work. By bringing together project management and software development, teams can improve workflows, communication, and ultimately the final product. The setup is straightforward, and the productivity gains are well worth the initial integration effort.
If you use GitHub instead, we have a dedicated article here.
UpSys Support for ClickUp
At UpSys, we specialize in helping teams optimize their project management processes using ClickUp. Whether you are considering adopting ClickUp or looking to maximize its potential for your team, our expertise in setup, consulting, coaching, and training will ensure you get the most out of this versatile tool.
Contact us to learn how we can tailor ClickUp to fit your team's unique needs and propel your project management to the next level!
Got a project with ClickUp?
Book a call Now 🗓️Supercharge your business today


